DIY Paint Correction Guide: Professional Techniques for Flawless Results (2025)
Introduction to Paint Correction
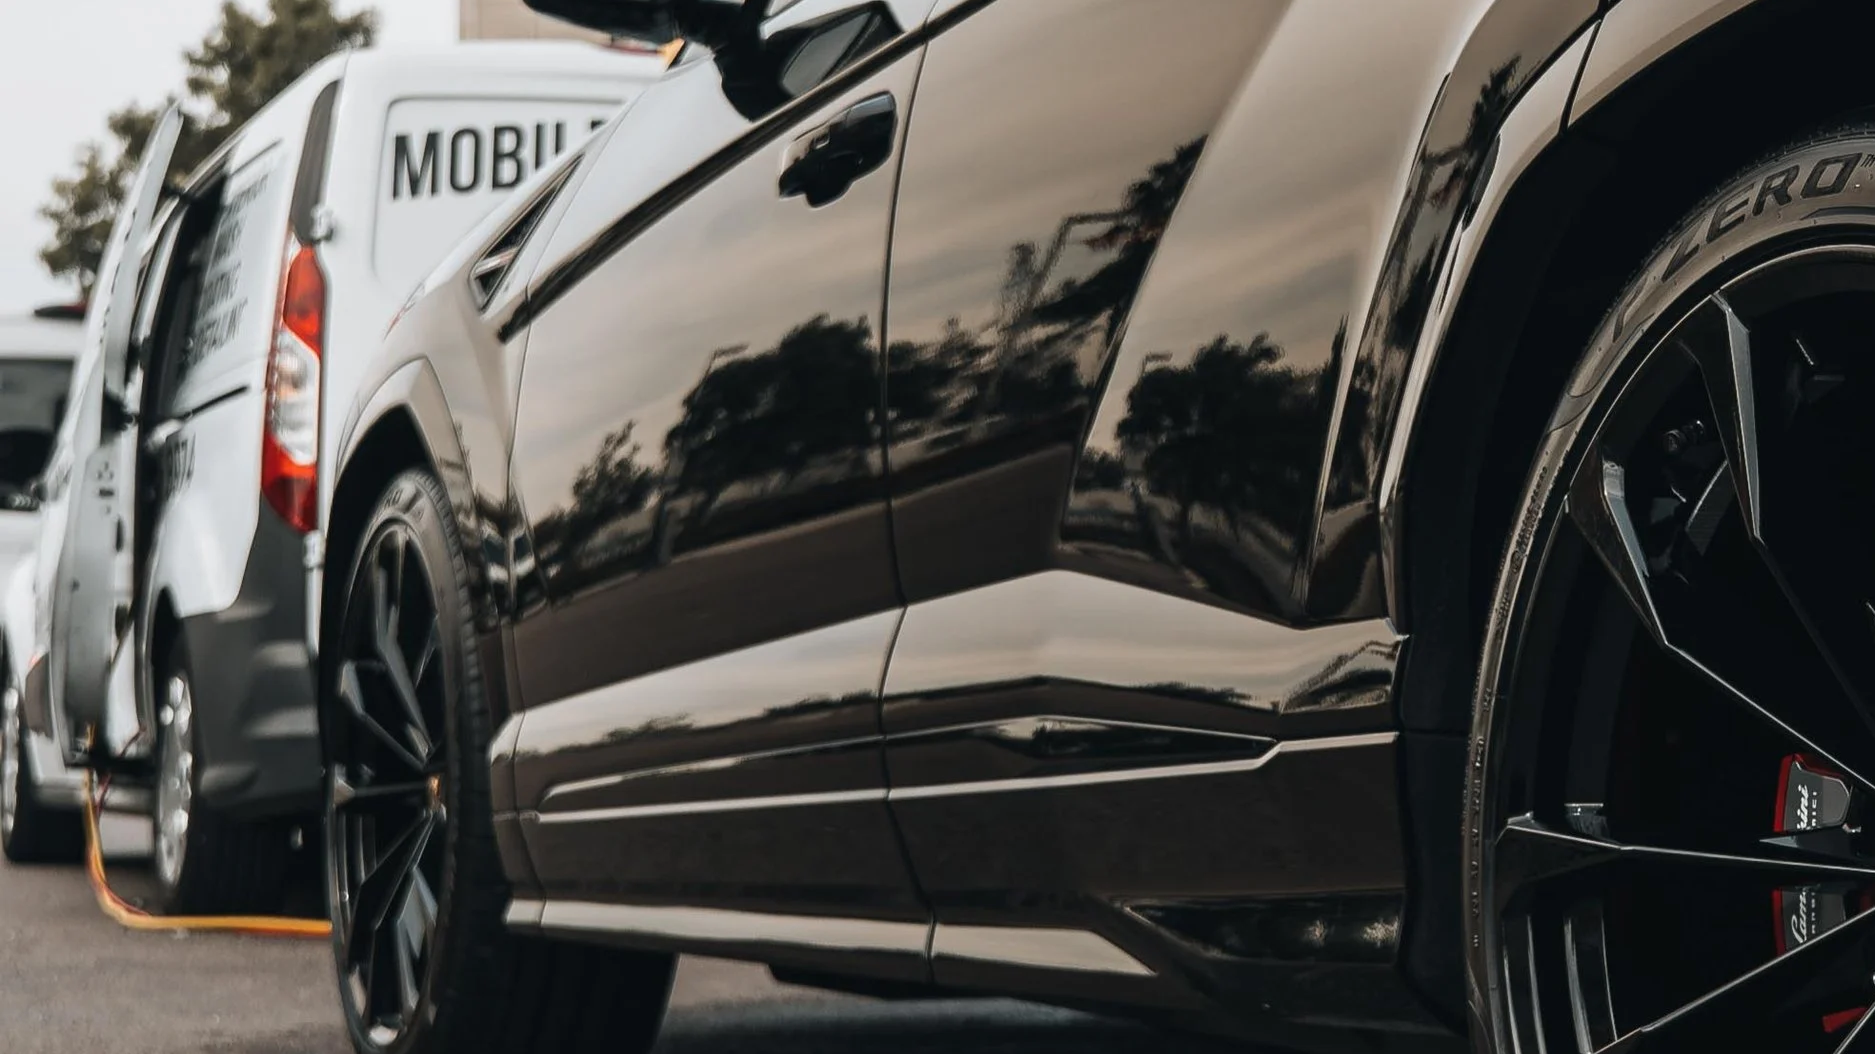
Struggling with swirl marks and scratches on your car's paint? Professional paint correction cost ranges from $500-2,000, but with the right DIY paint correction techniques, you can achieve stunning results for under $200. This comprehensive guide reveals the exact methods we use at Fresh Layer Mobile Detailing after perfecting these techniques on 1,500+ vehicles across San Diego.
What you'll master in this guide:
Complete DIY paint correction process from start to finish
Professional paint correction tools and techniques
Detailed paint correction cost comparison (DIY vs professional)
Common mistakes that waste time and damage paint
When to attempt DIY vs hiring San Diego professionals
Fresh Layer Mobile Detailing has restored paint on everything from daily drivers to luxury vehicles throughout La Jolla, Del Mar, and Carmel Valley since 2019.
Paint correction is a critical process in auto detailing that involves refining and restoring a vehicle’s paintwork to eliminate surface imperfections. These imperfections, which may include swirl marks, scratches, oxidation, and etching caused by environmental exposure, can detract from a car's appearance and reduce its overall value.
The process of paint correction
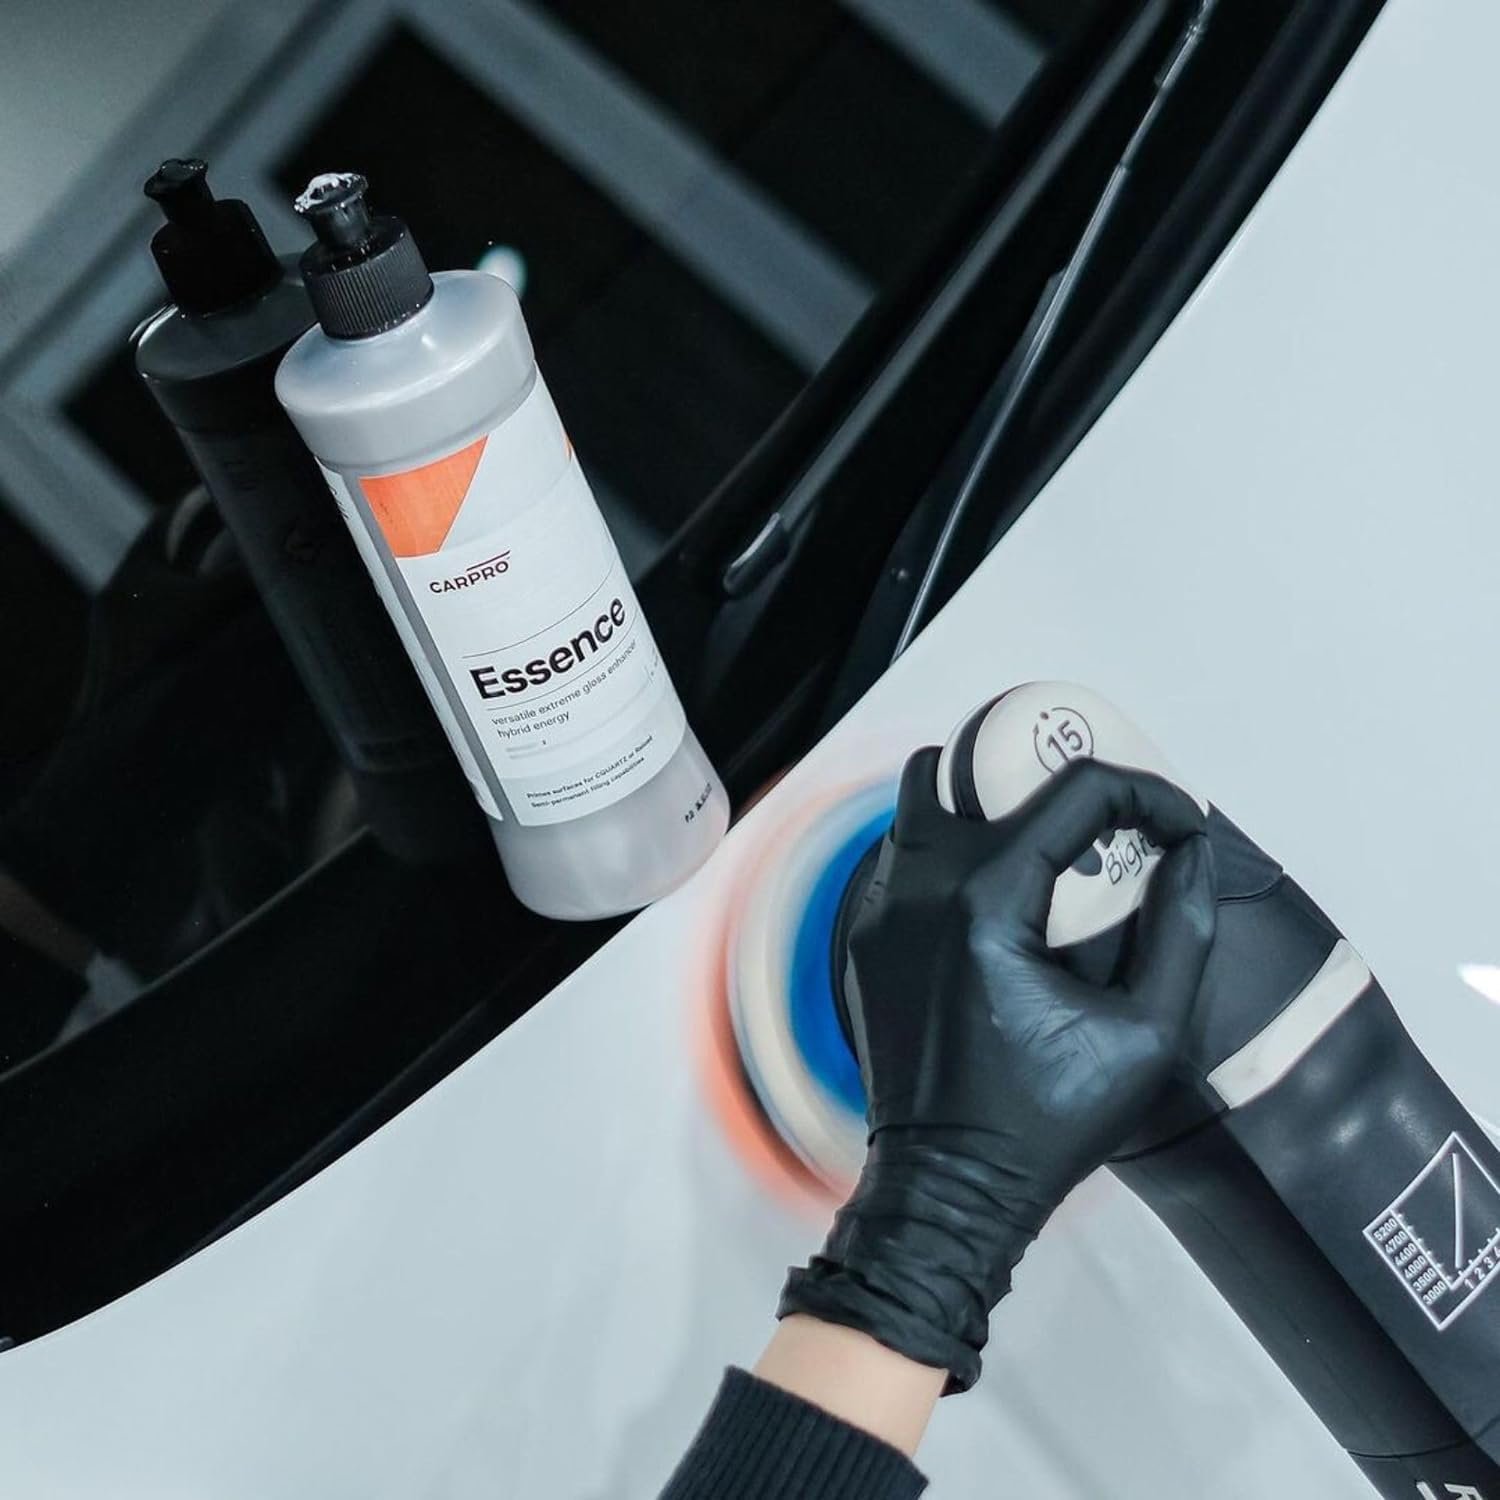
The process of paint correction requires a meticulous approach, utilizing specialized tools and products to achieve a flawless finish. It typically involves several steps: thorough cleaning, assessing the paintwork, and using mechanical polishers along with a range of abrasive compounds and polishes to gradually smooth out imperfections.
The primary goal of paint correction
The primary goal is to produce a surface that is as flawless as possible. The end result is not only visually stunning but also provides a protective benefit, as smooth paint is less susceptible to retaining dirt and contaminants. This detailed approach can significantly enhance the gloss and longevity of the vehicle’s paint, ultimately preserving the car’s aesthetic appeal and market value.
DIY Paint Correction Cost Calculator
Interactive Cost Comparison Tool
Understanding paint correction cost helps you make informed decisions about DIY vs professional services. Here's our comprehensive cost breakdown based on 1,500+ vehicles we've corrected across San Diego:
Cost Comparison Analysis
| Service Level | DIY Cost | Professional Cost | Your Savings | Time Investment |
|---|---|---|---|---|
| Light Correction (swirl removal) | $150-200 | $400-600 | $250-400 | 6-8 hours |
| Medium Correction (scratches + swirls) | $200-300 | $800-1,200 | $500-900 | 8-12 hours |
| Heavy Correction (deep scratches, oxidation) | $300-400 | $1,500-2,500 | $1,100-2,100 | 12-16 hours |
| Full Paint Restoration (show car finish) | $400-500 | $2,000-3,500 | $1,500-3,000 | 16-24 hours |
DIY Paint Correction Startup Costs:
Dual-action polisher: $120-200
Paint correction tools (pads, compounds): $80-120
Microfiber towels and accessories: $40-60
Paint thickness gauge (recommended): $80-150
Total initial investment: $320-530
Break-Even Analysis:
After correcting just 2-3 vehicles, your tool investment pays for itself compared to professional paint correction cost. Many DIY enthusiasts save $1,000+ annually by learning these techniques.
San Diego Market Insight: Local professional services charge premium rates due to high demand from luxury vehicle owners in La Messa and Del Mar. DIY skills become even more valuable in our market.
The Basics of Paint Correction

Types of Paint Imperfections
Paint imperfections are various forms of damage that detract from the smoothness and appearance of a vehicle's surface. Common types include:
| Type | Description |
|---|---|
| Scratches | Visible marks etched into the surface of the paint, often caused by abrasive contact with hard objects. |
| Swirls | Fine lines or circular scratches that usually result from washing or wiping the car with dirty cloths or sponges. |
| Oxidation | A dull, faded look that occurs when the paint is exposed to oxygen and sunlight over time, leading to the degradation of the paint. |
| Etching | Often caused by acidic substances like bird droppings or tree sap that have not been cleaned off promptly and have consequently damaged the paint. |
Differences Between Paint Correction and Basic Car Washing and Waxing
While regular car maintenance such as washing and waxing is essential for keeping a vehicle looking clean, paint correction is a more comprehensive and intensive process aimed at restoring and protecting the paint at a deeper level. Here are the key differences:
| Aspect | Car Washing | Paint Correction |
|---|---|---|
| Depth of Cleaning | Removes surface dirt and debris. | Addresses deeper imperfections in the paint itself. |
| Techniques and Tools Used | Involves soap, water, and sponges. | Requires specialized tools like orbital polishers, specific abrasive compounds, and finishing polishes. |
| Outcome | Maintains cleanliness and basic protection with wax layers. | Aims to restore the paint to a like-new condition, enhancing the vehicle's gloss, color depth, and overall aesthetics. |
Paint correction is a detailed process that not only improves the appearance of a vehicle but also adds to its longevity and value by preserving the quality of the paintwork.
Understanding Paint Correction: DIY vs Professional
DIY paint correction involves removing surface imperfections like swirl marks, light scratches, and oxidation using mechanical polishing techniques. The goal is restoring paint clarity and gloss without the expense of professional services.
What DIY Paint Correction Can Achieve:
Excellent Results For:
Swirl marks from improper washing
Light scratches (fingernail doesn't catch)
Water spot etching
Light oxidation and dullness
Hologram marks from poor polishing
Challenging for DIY:
Deep scratches through clear coat
Severe oxidation requiring wet sanding
Orange peel texture correction
Multi-stage paint systems
Show car-level perfection
The Science Behind Paint Correction:
Modern automotive paint consists of multiple layers: primer, base coat, and clear coat. DIY paint correction focuses on the clear coat, which protects the color beneath while providing gloss and depth.
How Polishing Works: Abrasive compounds remove microscopic layers of clear coat, leveling imperfections. Progressively finer polishes restore optical clarity and gloss. Done correctly, this process removes 1-3 microns of clear coat—well within safe limits for most vehicles.
DIY Success Factors:
Key to Professional Results:
Proper technique: Machine control and pad pressure
Correct products: Matching compounds to paint hardness
Adequate lighting: Revealing all imperfections
Patience: Rushing leads to poor results and damage
Fresh Layer's DIY Philosophy: We believe informed enthusiasts can achieve 80-90% of professional results with proper guidance. Our mobile detailing experience across San Diego has shown us what works—and what causes expensive mistakes.
Tools and Materials Needed for Paint Correction
Paint correction requires a specific set of tools and materials to effectively address and repair paint imperfections. Here’s an overview of essential items needed for this detailed process:
Overview of Tools
Polishers: Essential for mechanical polishing, these tools come in various forms, including orbital and rotary polishers.
Buffing Pads: Used in conjunction with polishers, these pads help apply compounds evenly and safely over the vehicle’s surface.
Microfiber Towels: Crucial for wiping off residues and polishing the car without introducing new scratches.
Lighting: Adequate lighting is vital to spot imperfections accurately during the correction process.
Paint Protection Tools: After correction, tools and materials for applying sealants or ceramic coatings are necessary to protect the paint.
Best DIY Paint Correction Kit: Essential Tools Guide
Choosing the right paint correction tools determines your success more than any other factor. After testing dozens of products across various San Diego climates and paint types, here are our proven recommendations:
Essential DIY Paint Correction Tools:
1. Dual-Action Polisher (Most Critical Tool)
Top Professional Recommendations:
RUPES LHR15ES: $280-320 (our shop standard)
Perfectly balanced, minimal vibration
Excellent for beginners and professionals
Wide pad availability and support
Chemical Guys TORQX: $150-180 (best value)
Great entry-level option
Reliable performance for DIY use
Includes basic accessories
Porter Cable 7424XP: $120-150 (budget option)
Proven track record
Parts readily available
Good for light to medium correction
Why dual-action over rotary: DA polishers are much safer for beginners, virtually eliminating the risk of burn-through while still providing excellent correction power.
2. Polishing Pads (Critical for Results)
Lake Country CCS Pads (Our Professional Choice):
Orange Heavy Cutting: For deep scratches and oxidation
White Polishing: For swirl removal and medium correction
Black Finishing: For final polish and gloss enhancement
Pad Sizes:
5.5" pads: Best for most DIY work, manageable size
6.5" pads: Faster coverage but requires more skill
3. Paint Correction Compounds and Polishes
Professional-Grade Products We Use:
Meguiar's M105/M205 System:
M105 Ultra-Cut Compound: Removes scratches and swirls
M205 Ultra Finishing Polish: Restores gloss and clarity
Cost: $45-60 for both (treats 8-10 vehicles)
Chemical Guys VSS System:
V32 Heavy Cut: Aggressive correction
V36 Medium Polish: Swirl removal
V38 Final Polish: Gloss enhancement
Cost: $65-80 for three-step system
4. Essential Accessories
Lighting (Non-negotiable):
LED work lights: $40-80
Paint inspection lights: $25-50
Reveals hidden imperfections others miss
Measurement Tools:
Paint thickness gauge: $80-150
Prevents costly burn-through mistakes
Essential for older or repainted vehicles
Cleaning Supplies:
Microfiber towels: $30-50 (various grades)
Pad cleaning brush: $8-15
IPA (isopropyl alcohol): $10-15
Complete Starter Kit Budget Breakdown:
Professional Setup: $450-600
Premium polisher + full pad selection + top compounds + all accessories
Quality Setup: $300-400
Mid-range polisher + essential pads + proven compounds + basic accessories
Budget Setup: $200-280
Entry polisher + basic pads + value compounds + minimal accessories
San Diego Climate Considerations: Our intense UV and salt air require more frequent paint correction. Investing in quality tools pays dividends when you're correcting paint 2-3 times per year instead of once.
Types of Compounds and Polishes
| Material/Tool | Description |
|---|---|
| Compound | A more abrasive product used to remove heavy imperfections such as deep scratches and etching. |
| Polish | Less abrasive than compounds, used to refine the finish and enhance the paint’s gloss after compounding. |
| Polishing Pads | These are attached to polishers and vary in levels of abrasiveness; different pads are used for compounding and polishing stages. |
| Polishing Machine Brands | High-quality machines, like those from Rupes, provide reliable and efficient polishing capabilities. |
Each of these tools and materials plays a crucial role in achieving a successful paint correction, restoring the vehicle's paint to a condition close to its original state when first applied. Proper use of these tools not only enhances the appearance of the car but also helps maintain its value and prolong the durability of the paintwork.
Step-by-Step Guide to Paint Correction

Step-by-Step DIY Paint Correction Process
This comprehensive DIY paint correction process is the exact method we've refined through 1,500+ vehicles across San Diego's diverse automotive landscape:
Phase 1: Preparation and Assessment (60-90 minutes)
Step 1: Deep Cleaning and Decontamination
Critical for success - any contamination left on paint will cause additional scratches during polishing.
Thorough Wash Process:
Pre-rinse: Remove loose dirt and debris
Two-bucket wash: Quality car shampoo with wash mitt
Clay bar decontamination: Remove embedded contaminants
Final rinse and dry: Microfiber towels only
San Diego-specific prep: Coastal vehicles require extra attention to salt deposits. Use distilled water for final rinse to prevent mineral spots.
Step 2: Paint Inspection and Documentation
Professional technique: Work in bright, indirect light or use LED inspection lights.
Inspection Process:
Systematic coverage: Work panel by panel
Mark imperfections: Use painter's tape to identify problem areas
Photograph before: Document starting condition
Test paint thickness: Check clear coat depth (minimum 3-4 mils needed)
Fresh Layer Pro Tip: Spend 20 minutes on inspection to save hours of unnecessary work. Focus efforts where they'll make the biggest visual impact.
Phase 2: Mechanical Correction (3-8 hours depending on severity)
Step 3: Test Spot Selection
Never skip this step - every paint type responds differently to compounds and techniques.
Test Spot Protocol:
Choose inconspicuous area: Lower door or bumper section
Try conservative approach first: Light compound, low speed
Evaluate results: Check for improvement and any damage
Adjust technique: Increase aggression only if needed
Step 4: Compounding (Heavy Correction Phase)
When needed: Deep scratches, oxidation, severe swirl marks
Professional Compounding Technique:
Product application: Pea-sized amount on pad
Speed settings: Start slow (speed 2-3), increase to 4-5
Overlapping passes: 50% overlap in crosshatch pattern
Section size: 2x2 feet maximum for consistency
Pressure: Let machine do the work - minimal downward pressure
Working Time: 3-4 minutes per section before compound breaks down
Step 5: Polishing (Refinement Phase)
Purpose: Remove compound marks and restore gloss
Polishing Technique:
Clean pad: Remove compound residue completely
Fresh polish: Different product than compound
Higher speed: Speed 4-6 for better finish
Lighter pressure: Focus on optical clarity
Final inspection: Use bright light to check results
Phase 3: Protection and Finishing (30-60 minutes)
Step 6: Paint Cleaner and Final Prep
IPA wipedown: 10% isopropyl alcohol solution removes polishing oils
Step 7: Protection Application
Choose based on desired longevity and budget:
Protection Options:
Car wax: 2-3 months protection, easy application
Paint sealant: 6-8 months protection, synthetic durability
Ceramic coating: 1-2 years protection, professional results
Quality Control Checklist:
✓ Visual inspection: Check all areas in bright light
✓ Touch test: Run hand over surface to feel smoothness
✓ Photo documentation: Compare before/after results
✓ Customer satisfaction: Would you pay for these results?
Time Investment Reality: Quality DIY paint correction takes 6-12 hours for a full vehicle. Rushing leads to poor results and potential damage.
Professional Paint Correction Services

Professional Paint Correction Techniques for DIY
These advanced techniques separate professional-quality DIY paint correction from amateur attempts. We've refined these methods through thousands of vehicles in San Diego's demanding environment:
Advanced Pad and Product Selection
Paint Hardness Assessment:
Why it matters: Japanese paints (Toyota, Honda) are typically harder than German paints (BMW, Mercedes), requiring different approaches.
Simple Test Method:
Start conservative: Use least aggressive combination first
Evaluate cutting power: Check progress after 1-2 passes
Adjust accordingly: Increase or decrease aggression as needed
Professional Matching:
Hard paints: More aggressive compounds, longer working time
Soft paints: Gentle compounds, shorter working time, easier correction
Machine Control Mastery
Speed and Pressure Techniques:
Professional secrets for consistent results:
Starting Protocol:
Speed 2-3: Product spread and initial cutting
Speed 4-5: Primary correction work
Speed 1-2: Final finishing passes
Pressure Management:
Initial contact: Firm pressure to spread product
Working passes: Medium pressure for cutting action
Final passes: Light pressure for finish quality
Pattern and Coverage Systems
Crosshatch Method (Our Standard):
Horizontal passes: 50% overlap, consistent speed
Vertical passes: 90-degree angle to horizontal
Final passes: Light pressure to remove pattern marks
Edge and Detail Work:
Reduce speed: Prevent heat buildup on edges
Smaller pads: 3" pads for tight areas
Hand finishing: Some areas require manual attention
Advanced Problem Solving
Deep Scratch Assessment:
Fingernail test: If fingernail catches, scratch may be too deep for DIY correction.
Progressive Approach:
Try polish first: Some scratches aren't as deep as they appear
Light compound: Step up only if needed
Aggressive compound: Last resort for DIY
Burn-Through Prevention:
Critical safety measures:
High-Risk Areas:
Panel edges: Thinner clear coat
Body lines: Heat concentration points
Previous bodywork: Unknown paint thickness
Prevention Techniques:
Paint thickness measurement: Check before starting
Lower speeds: Reduce heat generation
Frequent cooling: Allow panels to cool between sessions
San Diego Climate Adaptations
Temperature Management:
Optimal conditions: 65-75°F in shade
Hot Weather Adjustments:
Work in shade: Direct sun causes rapid product drying
Shorter sessions: Prevent overheating panels and products
More frequent breaks: Allow everything to cool
Marine Layer Benefits:
Higher humidity: Extends product working time
Cooler temperatures: Ideal correction conditions
Better visibility: Diffused light reveals imperfections
Professional Insight: We schedule our most challenging paint corrections during San Diego's marine layer season (May-July) for optimal conditions.
Common DIY Paint Correction Mistakes to Avoid

After witnessing hundreds of DIY attempts gone wrong throughout San Diego, here are the costliest mistakes and how to prevent them:
Critical Mistakes That Cause Permanent Damage
Mistake #1: Working in Direct Sunlight (30% of DIY failures)
The problem: Hot surfaces cause products to dry instantly, creating difficult-to-remove residue and potential paint damage.
Real San Diego example: Customer attempted correction on their black BMW in 90°F heat in Mission Valley. Result: Permanent white residue requiring professional wet sanding to remove.
Professional solution:
Work in shade: Garage, carport, or shaded area only
Cool panels first: Touch test - should feel cool to hand
Time of day: Early morning or late afternoon in San Diego
Product adjustment: Use slower-working compounds in heat
Mistake #2: Insufficient Paint Thickness Testing (25% of failures)
The problem: Attempting correction on thin or compromised clear coat leads to burn-through, requiring expensive paint repair.
Cost of this mistake: $800-2,500 per panel for professional paint repair.
Prevention protocol:
Paint thickness gauge: Measure before starting ($80-150 investment)
Safe minimums: Need 3+ mils clear coat for correction
Red flag areas: Panel edges, high-contact zones, previous repairs
Conservative approach: When in doubt, use lighter techniques
Mistake #3: Product Incompatibility (20% of failures)
The problem: Mixing different brand systems or using wrong pad/compound combinations.
Professional approach:
Single-brand systems: Stick with one manufacturer's complete line
Proven combinations: Use tested pad/compound pairings
Test first: Always test new combinations in hidden areas
Technique Errors That Waste Time and Products
Mistake #4: Excessive Pressure Application
The problem: Beginners think more pressure equals better results. Actually causes heat buildup and poor finish quality.
Correct technique:
Let machine work: Polisher does the cutting, not pressure
Weight of machine: Often sufficient for proper cutting
Pressure indicators: Watch for heat buildup or pad stalling
Mistake #5: Working Too Large Sections
The problem: Attempting 4x4 foot sections leads to product drying and inconsistent results.
Professional sizing:
Optimal sections: 2x2 feet maximum
Product working time: 3-4 minutes before breakdown
Consistent quality: Smaller sections ensure even coverage
Mistake #6: Inadequate Cleaning Between Steps
The problem: Compound residue left on paint interferes with polishing and final finish.
Proper cleaning protocol:
IPA wipedown: 10% isopropyl alcohol between steps
Clean microfibers: Fresh towels for each step
Pad maintenance: Clean pads every 2-3 sections
Local San Diego Specific Mistakes
Mistake #7: Ignoring Coastal Salt Contamination
The problem: Attempting correction without proper salt removal causes micro-scratching throughout the process.
Coastal preparation:
Extended decontamination: Extra clay bar work near coast
Distilled water rinse: Remove mineral deposits
Frequent cleaning: Salt builds up quickly during work
Mistake #8: Underestimating UV Damage Assessment
The problem: San Diego's intense UV creates deep oxidation that appears as simple swirl marks.
Proper assessment:
Strong lighting: Reveal true extent of damage
Test spots: Determine if oxidation requires wet sanding
Realistic expectations: Some damage needs professional intervention
Recovery Strategies for Common Mistakes
When Things Go Wrong:
Hologram Marks:
Cause: Wrong pad/compound combination or excessive speed
Solution: Polish with finishing pad and fine polish
Product Buildup:
Cause: Working in too-hot conditions or wrong product choice
Solution: Remove with IPA solution and start over
Missed Spots:
Cause: Inadequate lighting or rushing process
Solution: Complete inspection under bright light, address systematically
Professional Backup Plan: When DIY reaches its limits, Fresh Layer Mobile Detailing provides expert correction services throughout San Diego. We've rescued hundreds of DIY attempts, often saving money compared to starting over.
The Benefits of Paint Correction

Paint correction is not just about maintaining the aesthetics of your vehicle; it also plays a critical role in the overall upkeep and value retention. Here are the primary benefits of incorporating paint correction into your regular car maintenance routine.
Enhancing the Appearance of the Vehicle
Restored Shine and Gloss: Regular paint correction removes surface imperfections like scratches, swirls, and oxidation, restoring the original shine and gloss of the vehicle's paint.
Consistent Finish: It helps maintain a uniform finish across the vehicle, preventing certain areas from looking worn or dull compared to others.
Protecting the Vehicle’s Paint from Environmental Damages
Barrier Against Elements: Corrected paint provides a smoother surface, which minimizes the sticking of dirt and pollutants, reducing the risk of rust and decay caused by these contaminants.
Reduced Oxidation and Fading: By removing the oxidized layer and adding a protective layer on top, paint correction helps protect the paint from further oxidation and fading caused by UV exposure.
Increasing the Resale Value of the Car
Improved Curb Appeal: A well-maintained vehicle with a flawless finish is more appealing to potential buyers, making it easier to sell at a higher price.
Documentation of Maintenance: Regular detailing, including paint correction, can be documented and presented as part of the vehicle's maintenance history, proving to potential buyers that the car has been well cared for, which can significantly increase its resale value.
Incorporating regular paint correction into your vehicle maintenance routine not only keeps your car looking its best but also helps safeguard your investment, ensuring that it remains protected, retains its value, and stands out in the resale market.
Maintenance After Paint Correction
Once your vehicle has undergone paint correction, maintaining the results is crucial to ensure the longevity of the finish and protect your investment. Here are effective tips and recommended products to help maintain the paint after correction.
How to Maintain the Paint After Correction
Regular Washing: Wash your vehicle regularly using a pH-neutral shampoo that does not strip protective coatings. Use a soft wash mitt and a two-bucket method to avoid introducing new scratches.
Use of Microfiber Towels: Always dry your vehicle with clean, high-quality microfiber towels to prevent swirls and scratches that can occur with rougher fabrics.
Park Smartly: Whenever possible, park your car in a garage or under cover. This protects the paint from environmental factors like sun, rain, bird droppings, and tree sap, which can cause damage over time.
Recommended Products and Practices for Prolonged Results
Wax or Sealant Application: Apply a high-quality wax or sealant regularly. These products provide a protective layer over the paint, enhancing its gloss and protecting it from UV rays, moisture, and dirt.
Ceramic Coatings: For longer-lasting protection, consider a ceramic coating. Ceramic coatings provide a harder, more durable protective layer than traditional waxes or sealants, offering better resistance against scratches, chemicals, and UV light.
Avoid Automatic Car Washes: Automatic car washes often use abrasive brushes that can damage the paint. Opt for hand washing or touchless car washes instead.
Regular Inspections: Regularly inspect the paint for any new imperfections or signs of wear. Addressing these issues promptly can prevent them from worsening.
By following these maintenance tips and using the recommended products, you can prolong the pristine appearance of your vehicle’s paint after correction, ensuring it stays protected and looks great for years to come.
FAQ Section: Common Questions About Paint Correction
-
Paint correction is a process used to remove surface imperfections on a vehicle's paintwork, such as swirls, scratches, oxidation, and etching. It involves a thorough cleaning and decontamination of the paint followed by the use of abrasive compounds and polishes to level the paint surface, restoring its original shine and smoothness.
-
The frequency of paint correction depends on various factors, including how the vehicle is used, stored, and maintained. Typically, a full paint correction is only necessary when there are visible imperfections. For well-maintained vehicles, this might be every few years. Regular maintenance like washing and waxing can prolong the results and reduce the need for frequent corrections.
-
No, paint correction and waxing are not the same. Paint correction is a corrective process that removes imperfections from the paint's surface. Waxing, on the other hand, involves applying a protective layer on top of the paint to enhance its shine and protect it from external elements. Waxing can be part of the maintenance routine after paint correction.
-
Paint correction can remove many types of surface scratches and imperfections. However, if a scratch is too deep, such that it penetrates through the paint and reaches the primer or metal, paint correction alone might not be sufficient to remove it. In such cases, more extensive repairs might be necessary.
-
Paint correction is about repairing and restoring the existing paint surface by removing imperfections. Paint protection, such as waxing, sealing, or applying ceramic coatings, involves adding a layer on top of the paint to protect it from future damage and degradation.
When to Choose Professional Mobile Paint Correction
Even with perfect DIY paint correction techniques, some situations require professional intervention. Here's when to call Fresh Layer Mobile Detailing instead of attempting DIY:
Technical Limitations of DIY Paint Correction
Paint Damage Beyond DIY Capability:
Deep Scratches and Gouges:
Fingernail catch test: If fingernail catches in scratch, likely through clear coat
Professional requirement: Wet sanding or touch-up paint needed
Risk factor: DIY attempts often make damage worse
Cost consideration: Professional repair costs less than DIY failure
Severe Oxidation and Chalking:
Visual indicators: White, chalky residue that doesn't wash off
Professional tools: Wet sanding equipment and spray booth access
Expertise required: Color matching and blending knowledge
Time factor: 2-3 days professional work vs impossible DIY
Orange Peel Texture Issues:
What it is: Uneven clear coat creating bumpy surface texture
Professional solution: Wet sanding and re-clearing required
DIY limitation: Impossible to correct with polishing alone
Fresh Layer capability: Mobile wet sanding and spot refinishing
Vehicle Value and Insurance Considerations
High-Value Vehicle Protection:
When professional service is essential:
Luxury Vehicle Standards ($50,000+ value):
Risk vs reward: DIY mistakes cost more than professional service
Insurance implications: Damage may void coverage
Resale impact: Professional documentation adds value
Fresh Layer advantage: Specialization in luxury vehicle correction
Classic and Collector Cars:
Irreplaceable finishes: Original paint often cannot be duplicated
Expertise required: Understanding of vintage paint systems
Documentation needs: Professional records for authenticity
Insurance requirements: Many policies require professional work
Commercial Fleet Vehicles:
Liability concerns: Employee DIY work creates legal exposure
Consistency needs: Professional results across entire fleet
Time efficiency: Professional speed vs employee time cost
Warranty coverage: Professional guarantees protect investment
Complexity and Time Factors
Multi-Stage Correction Requirements:
Professional processes that exceed DIY capability:
Wet Sanding Integration:
When needed: Deep scratches, orange peel, severe oxidation
Professional tools: Pneumatic sanders, spray booth access
Expertise required: Knowing when to stop sanding
Fresh Layer mobile capability: Portable wet sanding systems
Color Sanding and Polishing:
Show car requirements: Mirror-like finish perfection
Time investment: 20-40 hours for complete vehicle
Professional efficiency: 2-3 days vs weeks of DIY attempts
Equipment needs: Multiple polishing machines, specialized compounds
San Diego Mobile Service Advantages
Location and Convenience Benefits:
Your Location Service:
Garage protection: Work in controlled environment
Time savings: No travel to shop, no vehicle drop-off
Supervision opportunity: Watch and learn professional techniques
Convenience factor: Work around your schedule
Equipment Transportation:
Professional setup: Full booth-quality lighting and tools
Power requirements: Generator systems for any location
Weather protection: Portable shade and wind barriers
Cleanup included: No mess left behind
Specific Situations Requiring Professional Service
Emergency Correction Needs:
Same-day service requirements:
Special events: Weddings, car shows, business meetings
Sale preparation: Real estate showing, vehicle sale
Insurance claims: Vandalism or accident damage
Fresh Layer capability: Emergency mobile response across San Diego
Paint Protection Film Integration:
Complex installation requirements:
Pre-installation correction: Paint must be perfect before PPF
Edge work precision: Critical for film adhesion
Contamination elimination: Any imperfection shows under film
Warranty requirements: Professional correction often required
Ceramic Coating Preparation:
Professional preparation standards:
Surface perfection: Coating amplifies any remaining imperfections
Decontamination depth: Professional-grade removal systems
Application environment: Controlled conditions required
Longevity factors: Proper prep determines coating lifespan
Cost-Benefit Analysis: DIY vs Professional
When Professional Service Pays:
Time Value Calculation:
DIY time investment: 8-16 hours for inexperienced user
Professional time: 4-8 hours for same results
Your hourly value: What's your time worth?
Opportunity cost: Other activities vs DIY paint correction
Risk Assessment:
Mistake probability: 30% for first-time DIY attempts
Damage costs: $500-2,500 per panel for professional repair
Success rate: 95%+ for professional service
Insurance protection: Professional liability coverage
Fresh Layer Mobile Value Proposition:
Mobile convenience: Service at your location
Professional results: Guaranteed satisfaction
Equipment investment: No tool purchases required
Learning opportunity: Watch professionals work
Time efficiency: Complete service in half the time
Ready for professional results without the learning curve? Fresh Layer brings expert paint correction directly to your location throughout San Diego, Del Mar, La Jolla, and Carmel Valley.
Why Fresh Layer Mobile Detailing Supports DIY Education
Our philosophy: Educated vehicle owners make better decisions about when to DIY and when to seek professional help. We'd rather you succeed with DIY than fail expensively.
When you need professional backup:
Complex corrections: Deep scratches, severe oxidation, wet sanding needs
High-value vehicles: When risk vs reward favors professional service
Time constraints: When you need results faster than DIY allows
Learning support: Watch professionals work to improve your techniques
Professional mobile service advantages:
✓ Your location: Service at home, office, or preferred location
✓ Expert results: 1,500+ vehicles corrected across San Diego
✓ Quality guarantee: Satisfaction guaranteed or we return to fix it
✓ Teaching opportunity: Learn while watching professionals work
San Diego Mobile Paint Correction Coverage:
Primary Service Areas:
La Jolla: Luxury vehicle specialists
Del Mar: Coastal paint correction experts
Carmel Valley: High-end mobile service
Downtown San Diego: Convenient urban service
Mission Valley: Fleet and commercial vehicles
Coronado: Military and residential service
Extended Service Areas:
Rancho Santa Fe, Encinitas, Carlsbad, Chula Vista, and throughout San Diego County
Ready to transform your vehicle's appearance? Whether you choose the DIY path or professional mobile service, Fresh Layer is here to help you achieve the stunning paint finish your vehicle deserves.