How to Remove Window Tint: Complete DIY Guide 2025
By Alex B, Fresh Layer Mobile Detailing - I've peeled tint off 1000+ cars in San Diego since 2018
Your window tint is driving you crazy, isn't it? Maybe it's bubbling up like a bad sunburn, turning that lovely purple color that screams "cheap tint job," or the cops keep hassling you about it being too dark. I get it - I see this stuff every day.
After seven years of mobile detailing in San Diego and working on over 1,000 vehicles, I've removed every type of tint imaginable. The good news? Learning how to remove window tint isn't as hard as most people think. You just need the right approach and a little patience.
Quick Answer: How to Remove Window Tint
The most effective DIY window tint removal process:
Heat the tint using a hair dryer or heat gun to soften adhesive
Peel slowly starting from one corner, maintaining heat throughout
Remove adhesive residue with ammonia solution or commercial remover
Clean thoroughly with automotive glass cleaner for crystal clarity
Time required: 2-4 hours for complete vehicle DIY cost: $25-75 vs $220-350 professional service
When Window Tint Removal Becomes Necessary
Before you begin the process of removing your car's window tint, it's essential to assess the type of tint and the adhesive used, as these factors significantly influence the removal strategy.
DIY window tint removal becomes essential when you notice these common issues I see regularly in San Diego:
Primary Indicators for Tint Replacement
Adhesive Failure and Bubbling: This is the most obvious sign that window tint removal is required. Bubbles form when the adhesive bond fails due to age, heat exposure, or poor initial installation. These bubbles not only obstruct visibility but also indicate complete adhesive breakdown.
Color Degradation: Inferior tint films often develop purple or blue discoloration over time, particularly under San Diego's intense UV exposure. This color shift indicates chemical breakdown of the film and reduced protective properties.
Physical Damage: Scratches, tears, or peeling edges compromise both appearance and functionality. Once tint begins peeling, the damage typically spreads rapidly.
Legal Compliance Issues: California Vehicle Code Section 26708 requires front side windows to maintain 70% visible light transmission. Non-compliant tint requires removal to avoid citations.
Tint Types and Removal Difficulty Assessment
Removing window tint effectively requires gathering the right tools and materials beforehand. Here’s a comprehensive list of what you'll need to ensure the process goes smoothly and safely:
Understanding your tint type helps determine the best way to remove window tint:
Dyed Window Films: Entry-level tints that use dye layers for darkness. Generally easier to remove due to simpler adhesive systems.
Metalized Films: Contain reflective metal particles. Moderate removal difficulty due to stronger adhesive bonds.
Carbon Tint Films: Higher-end films using carbon particles. More challenging removal due to advanced adhesive technology.
Ceramic Films: Premium tints using ceramic particles. Most difficult to remove due to sophisticated adhesive systems designed for longevity.
Best Methods for Window Tint Removal
After testing various window tint removal techniques on hundreds of vehicles, these methods deliver the most consistent results:
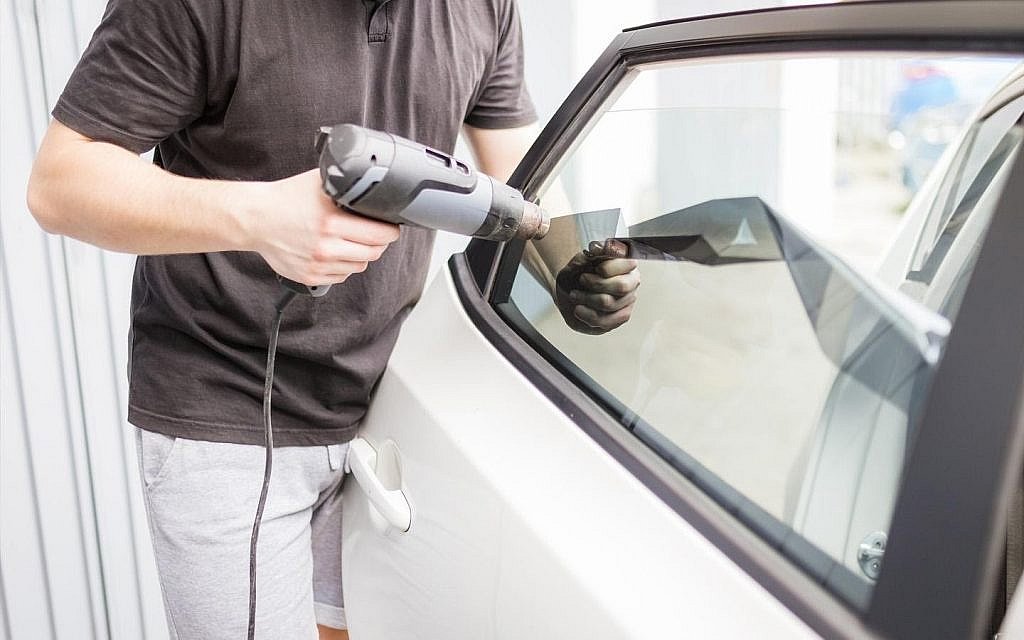
Heating the Tint
Prepare Your Tools: Start with a hairdryer or heat gun. If using a heat gun, set it to a low temperature to avoid damaging the glass or the car's interior.
Apply Heat: Begin at one corner of the window and slowly apply heat to the outer surface of the window tint. Move the hairdryer or heat gun back and forth to avoid concentrating heat in one spot.
Monitor the Tint: As the tint heats up, the adhesive underneath will begin to loosen. This may take a few minutes depending on the strength of the adhesive and the type of tint.
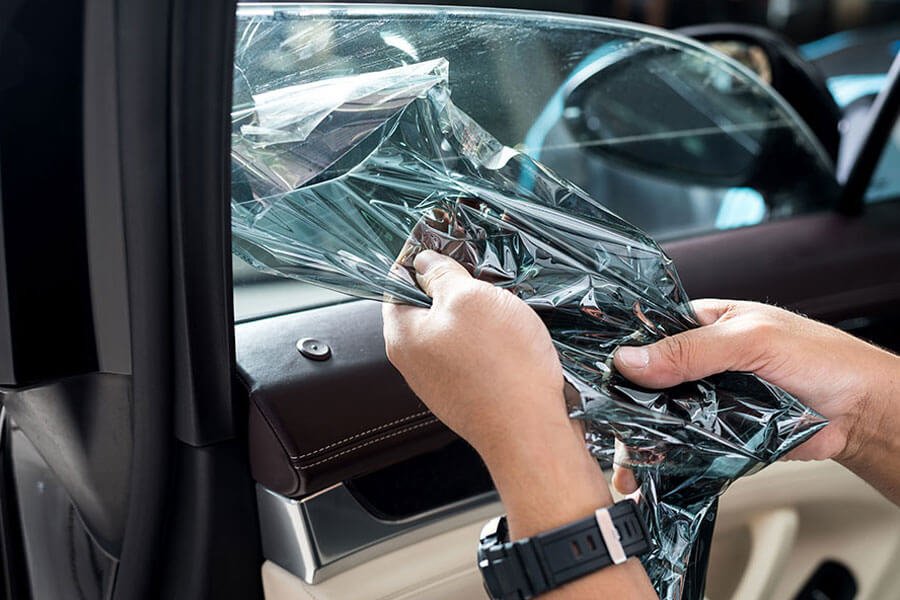
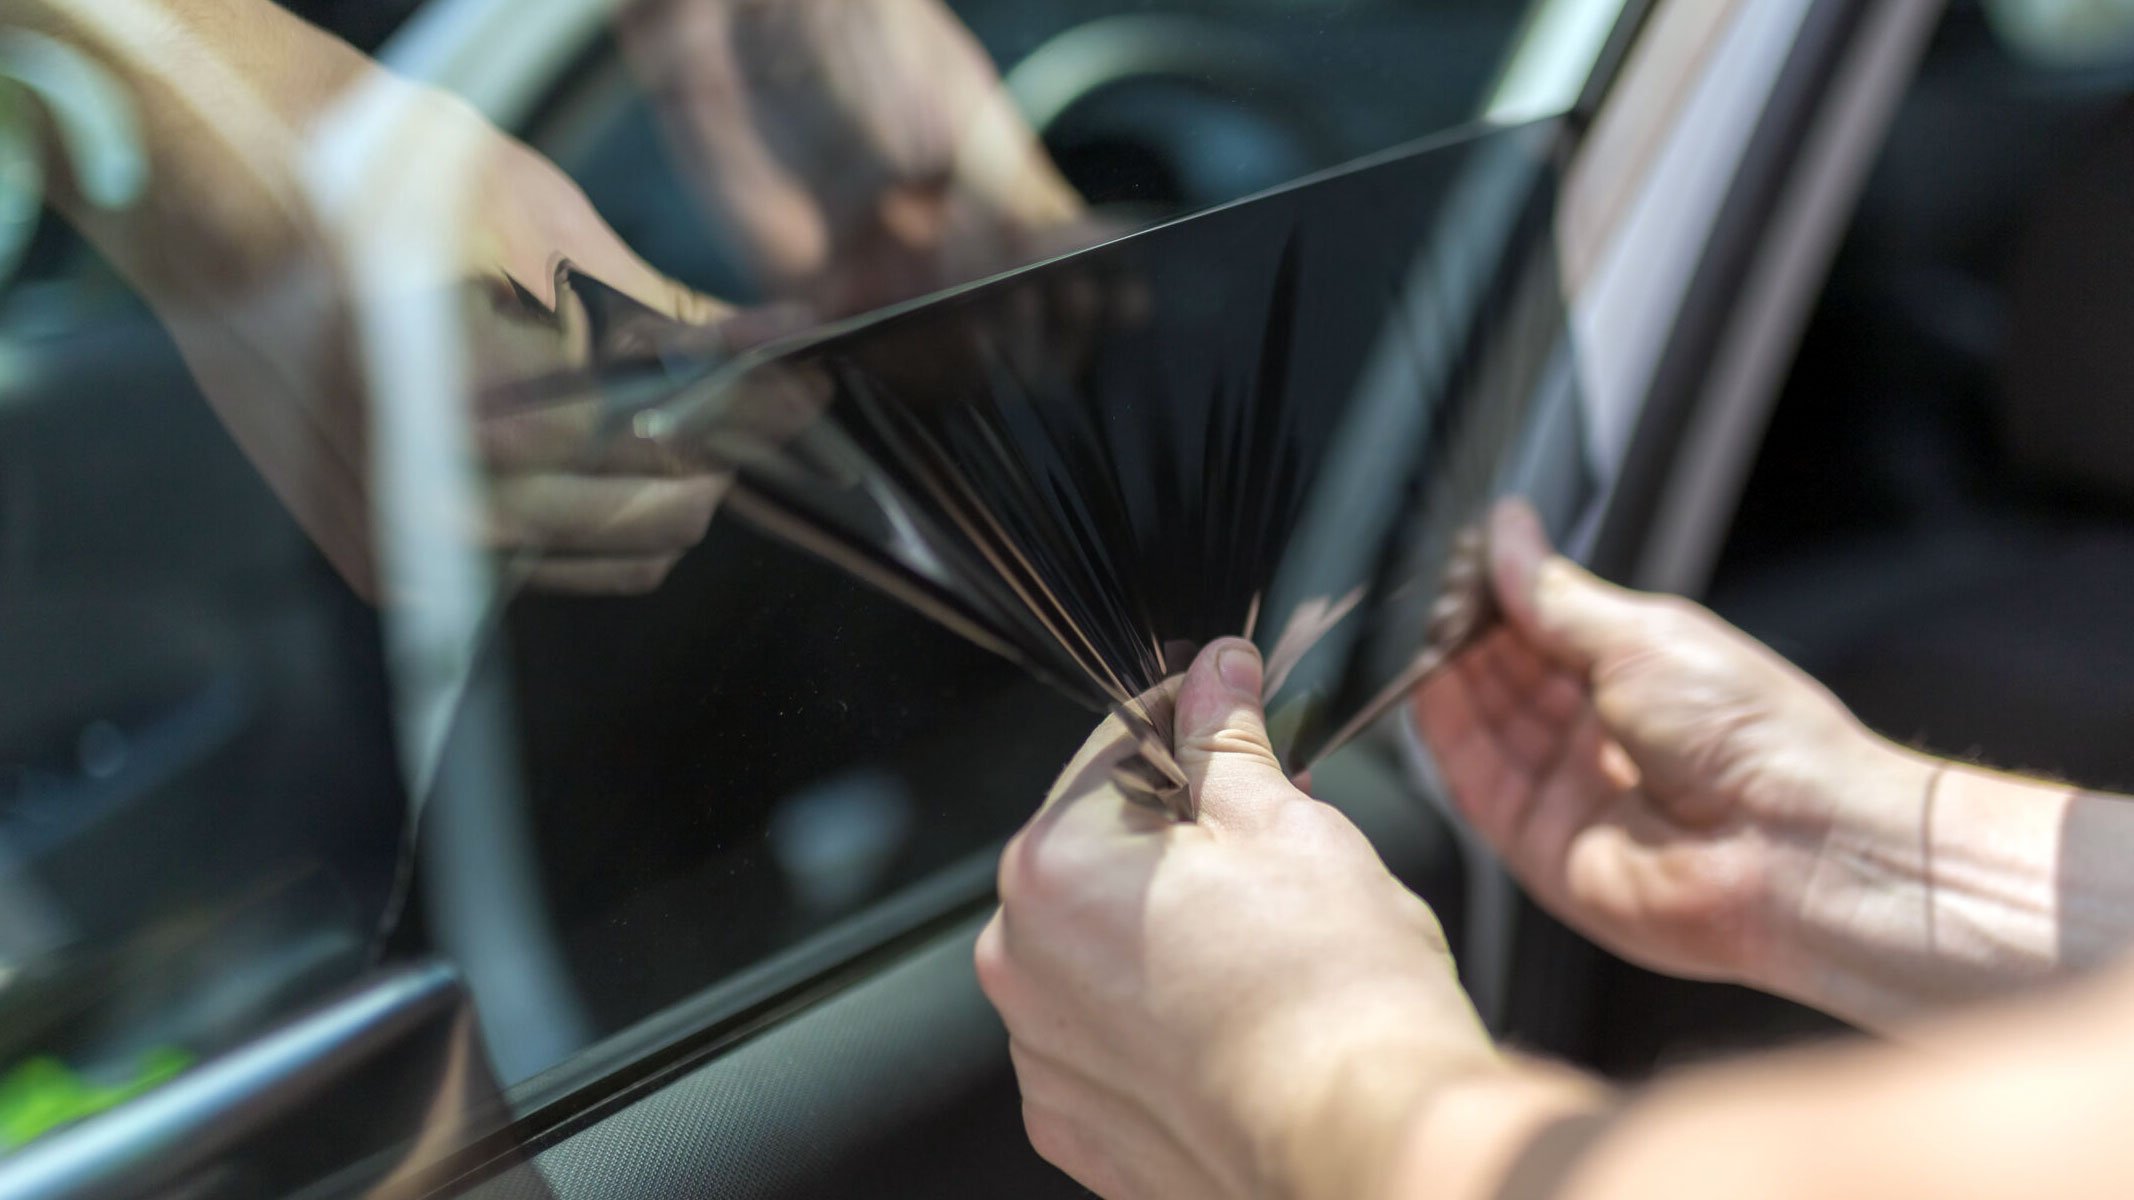
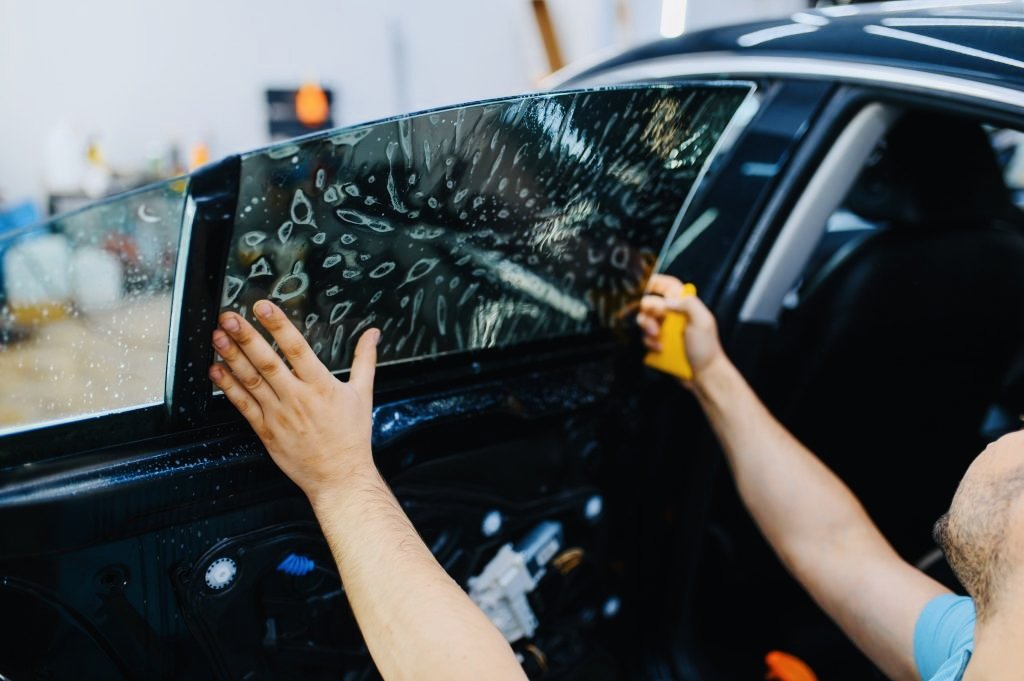
Peeling the Tint
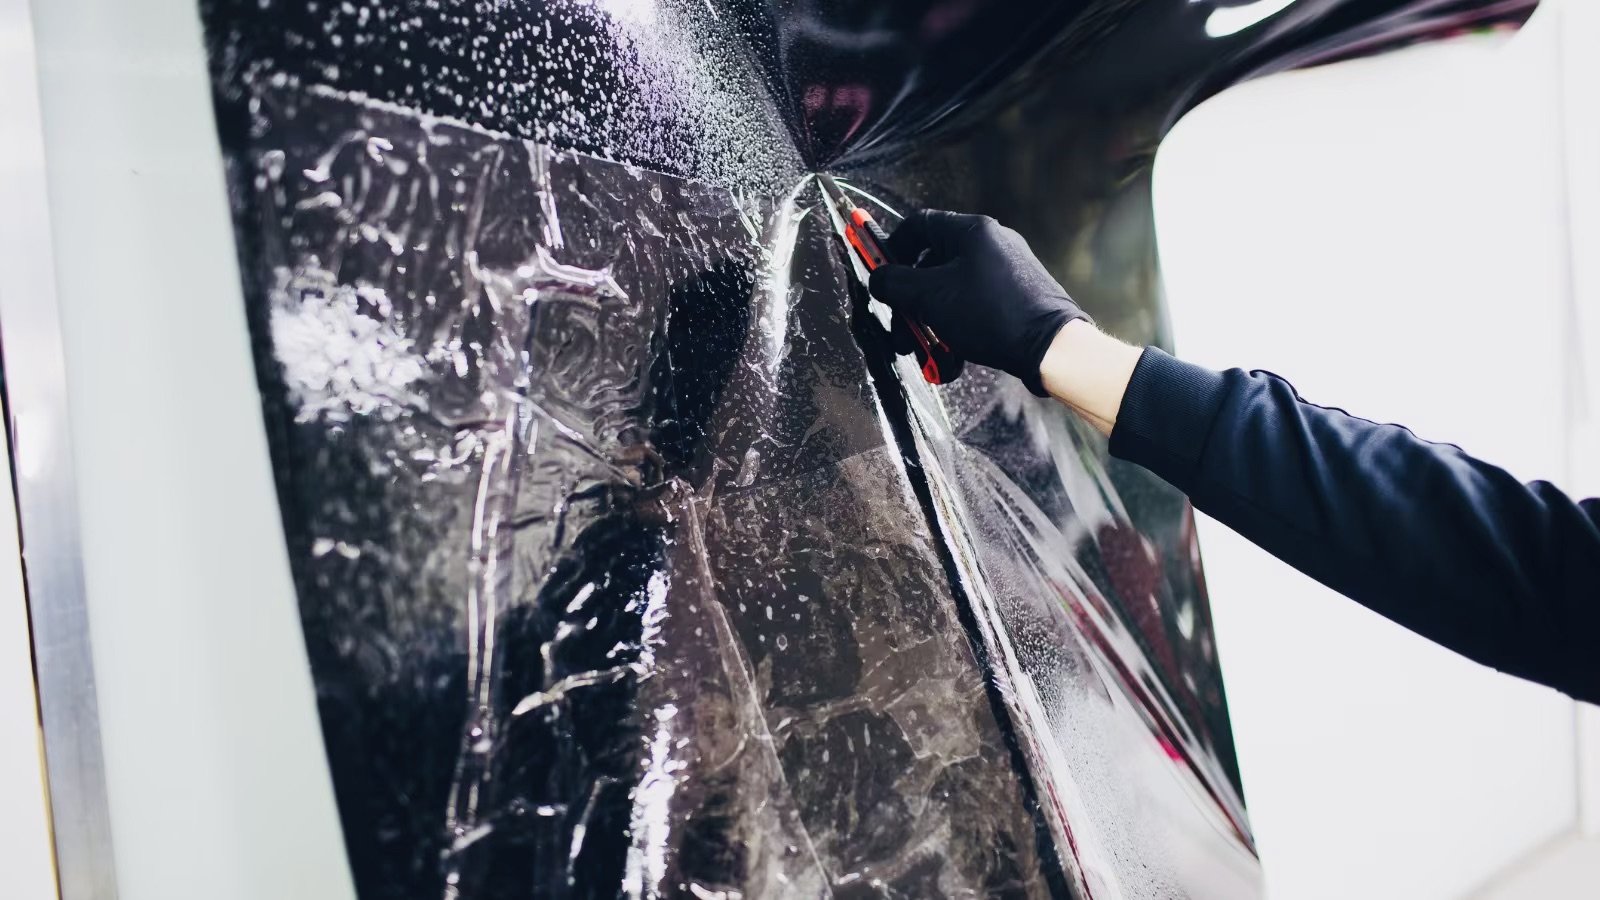
Start at a Corner: Once the tint is sufficiently heated, use a razor blade to carefully lift a corner of the film. Ensure your blade is sharp and held at a shallow angle to avoid scratching the glass.
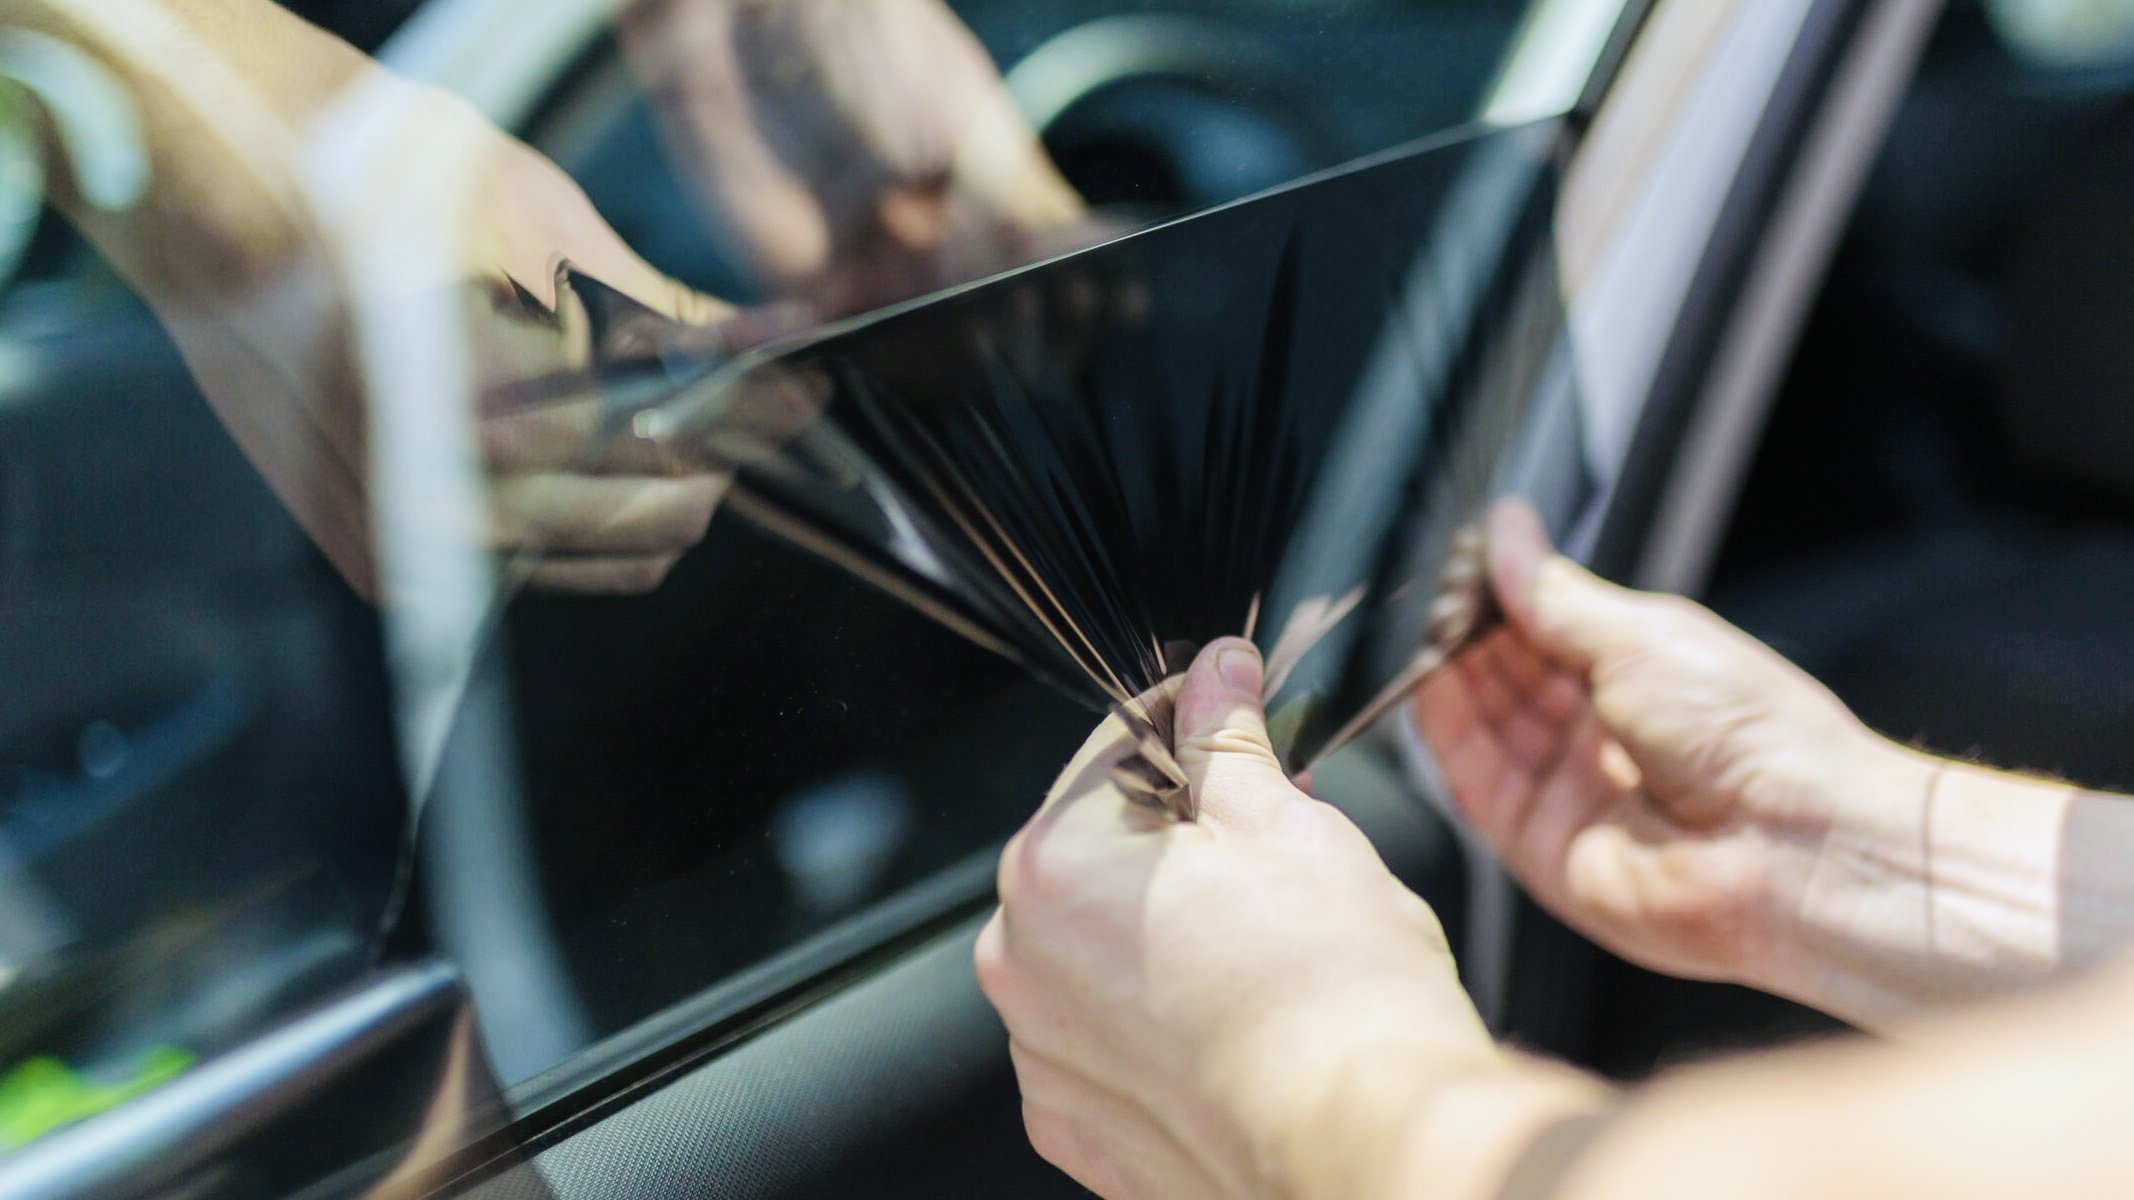
Peel Slowly: Gently pull the tint away from the glass. If the tint tears, reheat the next section and continue peeling. Ideally, the tint should come off in large strips.
Keep Heating: If the tint is stubborn, apply more heat as you peel to keep the adhesive soft.
Removing Adhesive
Assess the Residue: After removing the film, there will likely be some adhesive residue left on the window.
Apply Adhesive Remover: Spray ammonia, vinegar, or a commercial adhesive remover generously on the sticky areas. If using ammonia, ensure the car is in a well-ventilated area, and you’re wearing gloves and a mask.
Let it Sit: Allow the solution to soak into the residue for a few minutes to break down the adhesive.
Scrape Gently: Use a razor blade or a plastic scraper to gently remove the adhesive. Be cautious not to scratch the glass.
Wipe Clean: Frequently wipe away the residue with a microfiber cloth to check your progress and prevent spreading the sticky adhesive around.
Cleaning and Polishing
Clean Thoroughly: Once all the adhesive is removed, clean the window with soapy water or a glass cleaner using a microfiber cloth to remove any cleaning solution and remaining debris.
Dry the Window: Use a clean, dry microfiber cloth to dry the window completely.
Polish for Clarity: For extra clarity and shine, apply a small amount of glass polish with a soft cloth in circular motions. This helps remove any fine scratches and leaves the window looking clear and new.
Tips for Success
Patience is Key: The removal process can be tedious. Take your time to avoid mistakes that could damage your windows.
Check Local Regulations: If you plan to re-tint, ensure that the new tint adheres to local legal requirements regarding visibility and reflectivity.
Following these detailed steps will help you successfully remove old window tint, leaving your car windows clean and ready for new tint or to enjoy untinted clarity.
Professional Technique: Heat Gun Method
The heat gun approach represents the easiest way to remove window tint for most applications. This method provides consistent temperature control, allowing precise softening of adhesive bonds without overheating glass surfaces.
Temperature Guidelines: Maintain 200-300°F surface temperature. Higher temperatures risk glass damage, while insufficient heat leaves adhesive intact.
Application Pattern: Work in 12-inch sections, maintaining continuous movement to prevent hot spots. Consistent heat application ensures uniform adhesive softening.
San Diego Climate Advantage: Solar Heat Method
San Diego's consistent sunshine makes the ammonia-solar technique particularly effective for DIY window tint removal. This method combines chemical adhesive breakdown with natural heat acceleration.
Optimal Conditions: Exterior temperatures above 80°F with direct sunlight exposure. Cloud cover reduces effectiveness significantly.
Essential Tools and Materials
Successful window tint removal requires specific tools and materials. Professional results depend on using appropriate equipment rather than improvised alternatives.
Primary Tools for Tint Removal
Heat Application Equipment:
Professional heat gun with variable temperature control ($40-80)
High-power hair dryer as alternative option ($20-40)
Infrared thermometer for temperature monitoring ($15-30)
Mechanical Removal Tools:
Sharp razor blades (replace frequently for optimal performance)
Plastic scrapers (various angles for different applications)
Precision utility knives for detailed work
Chemical Cleaning Solutions:
Automotive-grade adhesive remover ($10-20)
Household ammonia (diluted to 50% concentration)
pH-neutral automotive glass cleaner
Isopropyl alcohol (91% concentration preferred)
Safety Equipment Requirements
Personal Protective Equipment:
Chemical-resistant gloves (nitrile recommended)
Safety glasses with side protection
Respiratory protection when using ammonia
Long-sleeve clothing for chemical protection
Workspace Preparation:
Adequate ventilation for chemical use
Drop cloths to protect vehicle surfaces
Organized tool layout for efficient workflow
Professional Step-by-Step Removal Process
This systematic approach ensures successful window tint removal while minimizing glass damage risks:
Phase 1: Surface Preparation (15-20 minutes)
Environmental Setup: Work in shaded areas to control temperature and prevent rapid chemical evaporation. Direct sunlight complicates the removal process by causing uneven heating.
Window Assessment: Examine tint condition, thickness, and adhesive type. Look for existing damage or areas where removal might be easier to initiate.
Tool Preparation: Organize all materials within easy reach. Sharp tools dull quickly, so have replacements ready.
Phase 2: Initial Heat Application (20-30 minutes per window)
Systematic Heating Pattern: Begin heating from the top corner of the window, working in overlapping 12-inch sections. Maintain the heat gun 6-8 inches from the surface.
Temperature Monitoring: Watch for tint film softening - it becomes pliable and slightly darker when properly heated. Avoid overheating, which can damage window seals or electrical components.
Edge Preparation: Focus extra heat on corners and edges where you'll begin peeling. Well-heated edges lift more easily and reduce tearing.
Phase 3: Mechanical Removal (30-45 minutes per window)
Initial Edge Lifting: Use a razor blade at a shallow angle to lift one corner. The goal is creating enough edge to grip with fingers, not cutting through the tint.
Continuous Peeling Technique: Pull the tint at a 45-degree angle while maintaining heat on the area being removed. Consistent pulling speed prevents tearing.
Heat Maintenance: Keep the heat gun active throughout the peeling process. Cold adhesive bonds strongly and causes tearing.
Phase 4: Adhesive Residue Removal (30-60 minutes per window)
Chemical Application: Apply adhesive remover generously to remaining residue. Allow 5-10 minutes for chemical penetration before scraping.
Mechanical Scraping: Use plastic scrapers to avoid glass damage. Work in small sections, reapplying chemical as needed.
Final Cleaning: Remove all chemical residues with automotive glass cleaner. Residual chemicals can cause water spotting or streaking.
Phase 5: Quality Inspection and Finishing (10-15 minutes per window)
Surface Examination: Check for remaining adhesive, scratches, or imperfections. Address any issues before declaring the job complete.
Final Cleaning: Use professional-grade glass cleaner and microfiber cloths for crystal-clear results.
Cost Analysis: DIY vs Professional Services
Understanding the true costs helps determine whether DIY window tint removal makes financial sense for your situation:
DIY Window Tint Removal Investment
Basic Heat Gun Method: $50-80 total investment
Heat gun: $40-60
Razor blades and scrapers: $10-15
Cleaning chemicals: $15-25
Safety equipment: $15-30
Professional Tool Investment: $150-300
Variable temperature heat gun: $80-120
Complete scraper set: $30-50
Professional adhesive removers: $25-40
Quality safety equipment: $40-60
Time Investment: 3-6 hours depending on vehicle size and tint condition
Professional Service Pricing Analysis
Fresh Layer Mobile Detailing (San Diego Market):
Compact vehicles (2-door): $120-160
Mid-size sedans (4-door): $150-200
SUVs and trucks: $180-250
Premium/luxury vehicles: $200-300
Service Value Proposition:
Professional guarantee against glass damage
Complete adhesive removal
Time efficiency (1-2 hours total)
Insurance coverage for any complications
Break-Even Analysis
Single Vehicle: Professional service costs 2-4x DIY materials Multiple Vehicles: DIY becomes cost-effective after 2-3 removals Risk Factor: Professional service eliminates costly mistake potential
Safety Considerations and Best Practices
Window tint removal involves chemicals and heat that require proper safety protocols:
Chemical Safety Protocols
Ammonia Handling: This chemical effectively dissolves adhesive but produces harmful vapors. Always work in well-ventilated areas and wear appropriate respiratory protection.
Skin Protection: Chemical removers can cause irritation or burns. Use chemical-resistant gloves and avoid prolonged skin contact.
Eye Safety: Splashing chemicals or flying debris pose eye injury risks. Safety glasses with side protection are essential.
Heat Application Safety
Glass Thermal Stress: Excessive heat can crack window glass, particularly on older vehicles. Monitor temperatures carefully and avoid hot spots.
Interior Protection: High temperatures can damage dashboard materials, electronics, or upholstery. Protect these surfaces during removal.
Burn Prevention: Heat guns reach temperatures exceeding 1000°F. Maintain safe distances and never touch recently heated surfaces.
When Professional Service Makes Sense
Look, I'm going to be straight with you about when you should just call someone like me instead of tackling this yourself:
Your car is worth more than your daily driver - If you're dealing with a luxury vehicle, classic car, or something you'd cry about if it got damaged, pay a professional. We have insurance for a reason.
The tint is really old and gnarly - Sometimes I see tint that's been on for 15+ years and it's basically glued on. If your first attempt isn't going well, stop and call someone.
You've got defroster lines - Those thin lines on your back window break easily. I've seen too many DIY jobs turn into expensive window replacements.
Time is money for you - If you bill $50+ an hour or just hate this kind of work, paying someone saves your sanity and your Saturday.
FAQ: Common Window Tint Removal Questions
-
The heat gun method is most effective for DIY window tint removal. Heat the tint to 200-250°F, then peel slowly while maintaining temperature. Most tint removes cleanly with proper heat application.
-
Proper technique using plastic scrapers and controlled heat presents minimal glass damage risk. Metal scrapers or excessive heat can cause scratches or thermal stress cracks. Professional removal guarantees glass protection.
-
Professional window tint removal in San Diego ranges from $120-250 depending on vehicle size. DIY costs $25-75 for materials but requires 3-6 hours of labor.
-
Essential tools include a heat gun or hair dryer, sharp razor blades, plastic scrapers, adhesive remover, and safety equipment. Quality tools significantly improve results and safety.
-
Proper removal technique minimizes residue, but some adhesive typically remains. Commercial adhesive removers or ammonia solutions effectively eliminate residual adhesive.
The Real Talk on DIY Window Tint Removal
Here's the bottom line after doing this for seven years: most people can handle DIY window tint removal if they take their time and don't try to rush it. The technique isn't rocket science - heat it up, peel it off, clean up the mess.
But I've also seen plenty of DIY jobs go sideways. Scratched windows, broken defroster lines, and adhesive that looks like someone smeared peanut butter on the glass. When that happens, fixing it costs way more than just doing it right the first time.
If you decide to tackle it yourself, remember: patience beats speed every time. That tint isn't going anywhere, so take your time and do it right.
Need help in San Diego? I've been removing tint since 2018 and I've never scratched a window or damaged defroster lines. Sometimes it's worth paying someone who does this every day. Contact Fresh Layer Mobile Detailing if you want guaranteed results without the weekend frustration.
Questions about your specific situation? Feel free to ask. I've probably dealt with your exact tint nightmare before, and I'm happy to help you figure out the best approach.